
Halloween can be spooky with its ghosts, ghouls, goblins and monsters, and unfortunately, some of the scary parts of celebrating Halloween are all too real. Preparing for and celebrating Halloween can introduce hazards that can lead to injuries. We do things that are a departure from our routine activities: using a ladder to hang decorations, trick-or-treating in costumes that may present tripping hazards or limit our fields of vision, or burning candles in unattended pumpkins. Halloween-related hand injuries are a common mishap. According the U.S. Consumer Product Safety Commission, 44 percent of the estimated 4,500 Halloween-related injuries in 2019 were related to pumpkin carving activities. In this week’s blog, we will take a close look at a common hand injury associated with that autumnal activity.
What Happened?
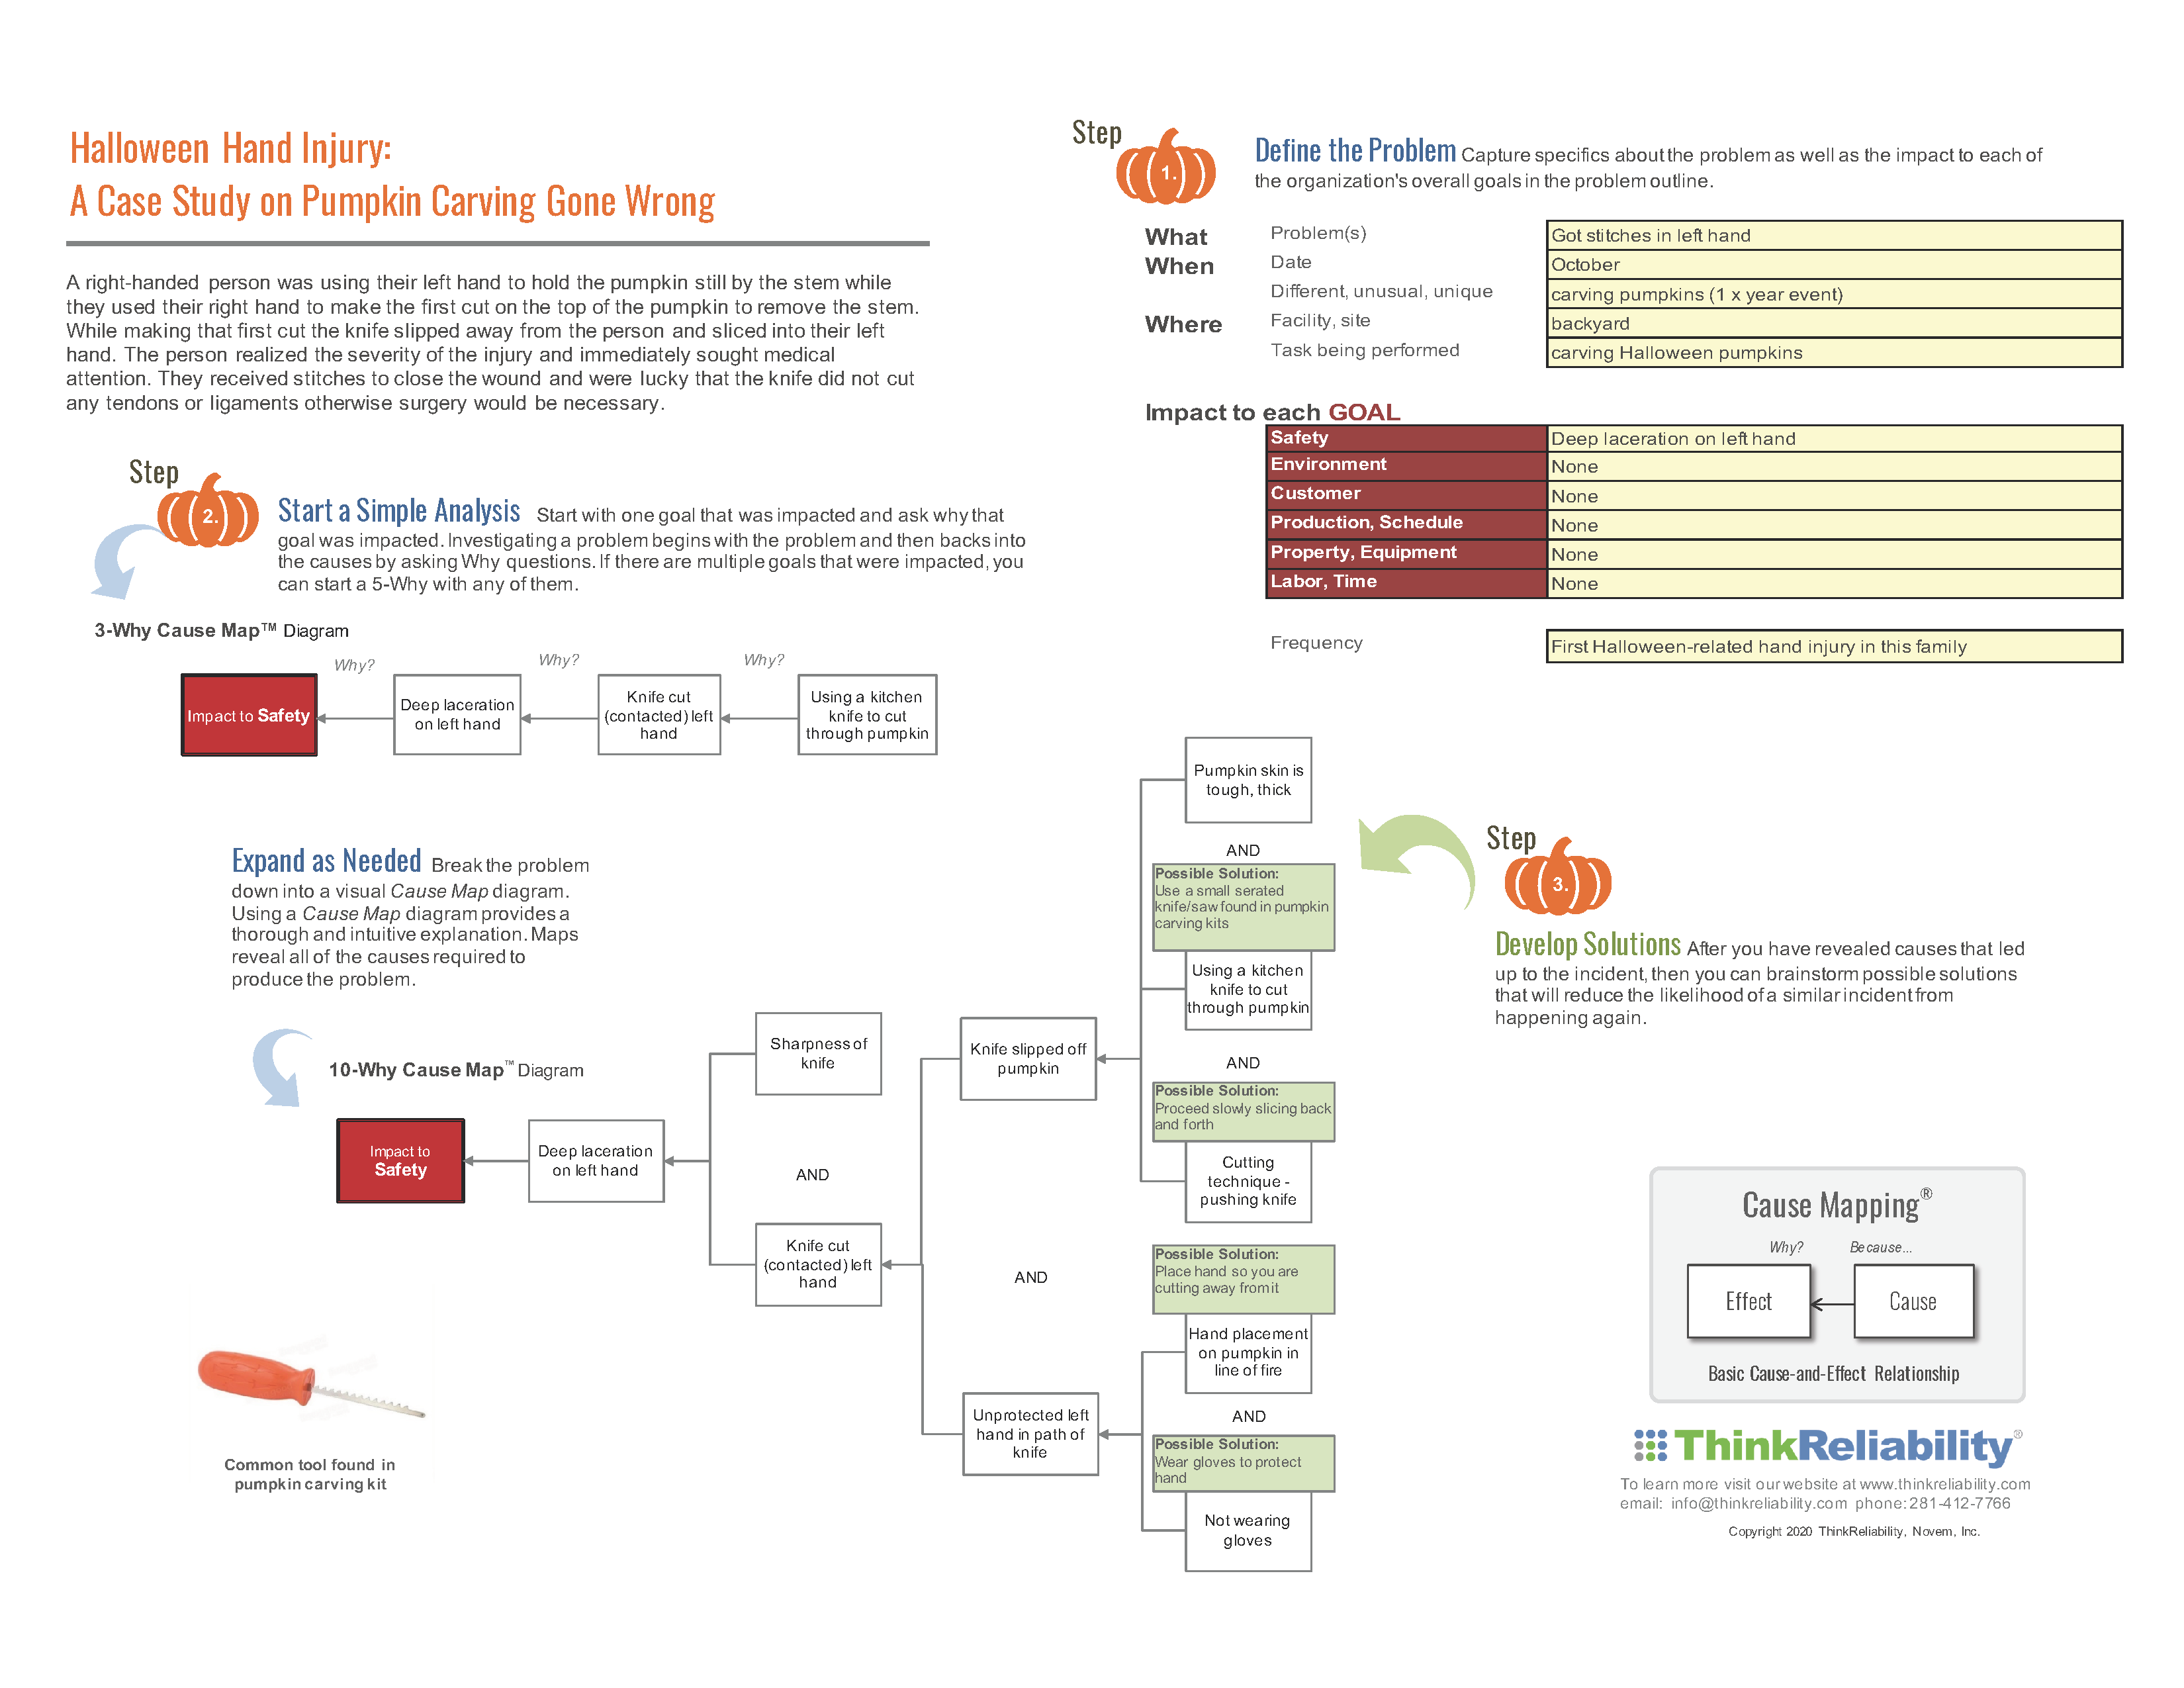
In this example, a right-handed person used their left hand to hold a pumpkin still by the stem while using their right hand to make the first cut on the top of the pumpkin in an effort to remove the stem. While making that first cut, the knife slipped away and sliced into their left hand. The person realized the severity of the injury and immediately sought medical attention—resulting in several stitches to close the wound. They were lucky the knife did not cut any tendons or ligaments, otherwise, surgery would have been necessary.
Understanding Why and How It Happened
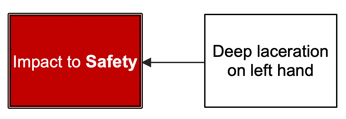
In a previous blog, we laid out the four basic building blocks for how to investigate a hand injury using a Cause Map™ diagram. Every hand injury includes: the hand, the hazard, contact between the hand and the hazard, and the severity of the contact. To begin the investigation, we ask one Why question, resulting in a 1-Why Cause Map diagram. An impact to our safety goal of zero injuries occurred because there was a deep laceration on the left hand.
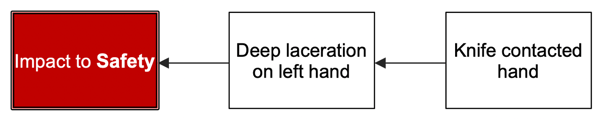
Then, we ask, “Why?” again to build a 2-Why. On the Map below, we can read it by starting on the far left and asking the Why questions as we move right. So here we have, “Why was there an impact to safety? Because there was a deep laceration on the left hand. Why was there a deep laceration on the left hand? Because the knife contacted the hand.” We can expand the Cause Map diagram further by adding more detail.
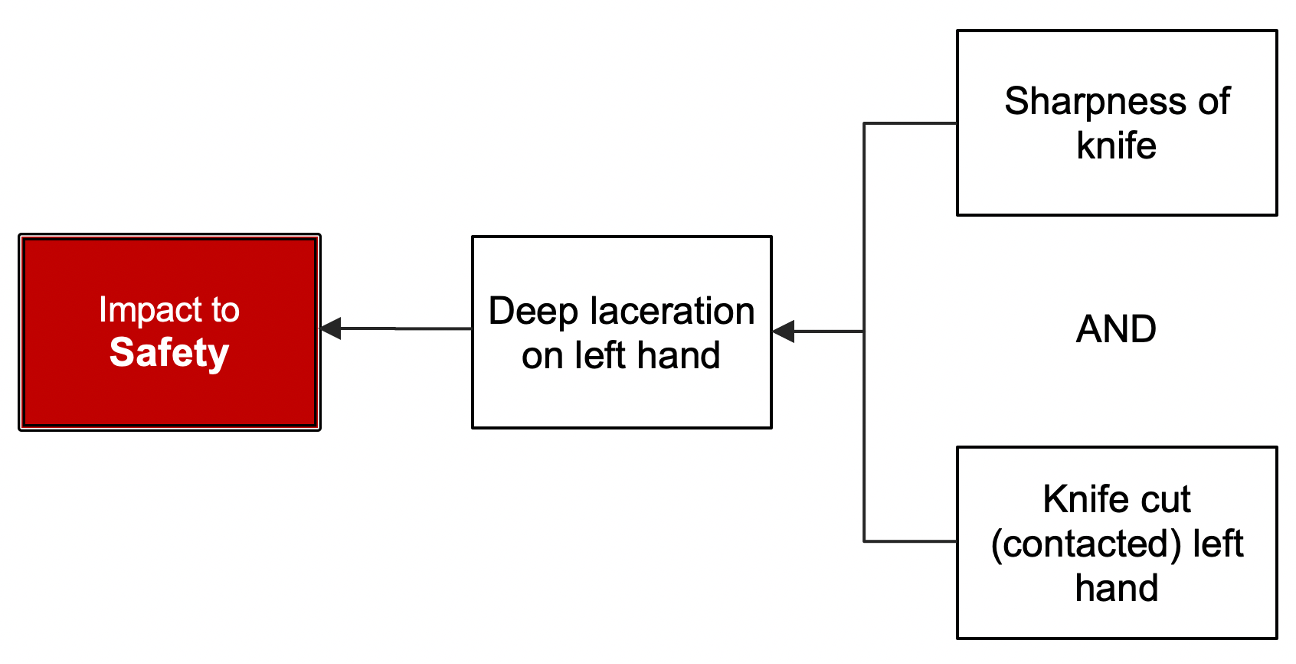
Although it is true that the knife did contact the hand, that alone doesn’t explain why a deep laceration occurred. We can also ask, “What else is required to get a deep laceration as opposed to a small or shallow laceration? Why was this cut so bad?” By asking this question, we reveal another causal path and a parallel, non-linear 3-Why because BOTH causes are required: the knife had to contact the hand and the knife was sharp. We show this by putting them in parallel and adding an AND between the two causes. Click here to learn more about how to add detail and reveal additional causes.
We can continue asking Why questions and, eventually, the Cause Map diagram might look something like the Cause Map diagram below. Now, we have a much better understanding of why the injury happened. The diagram includes three other nonlinear causal paths.For the knife to contact the hand, an unprotected hand and a knife must be at the same place at the same time. Then we ask, “Why was the knife at that location?” and, “Why was the unprotected hand at that location?” Similarly, we want to ask, “What was the hand doing there?” and, “Why was it unprotected?”

If you are like me, then you likely want to continue asking Why questions like: why weren’t we using gloves, or why were we using a kitchen knife instead of pumpkin carving kit tools. Depending on the magnitude of the incident, you can add more detail to build a larger Cause Map diagram. This incident wouldn’t have happened if just one of the causes had been controlled, but by offering and implementing solutions to control more causes, there is a cumulative reduction in risk (also called layers of protection).
Here we have enough information to propose solutions that will add multiple layers of protection to reduce the likelihood of a similar hand injury from occurring. Solutions could include wearing cut resistant gloves, using a pumpkin carving toolkit made specifically for this task, changing our cutting technique/method, and removing the non-dominant hand from the line of fire.
For a one-page summary PDF download with solutions, click on the thumbnail below.
For additional Halloween safety tips, check out the American Society for Surgery of the Hand’s pumpkin carving safety recommendations and the Consumer Product Safety Commission has developed suggestions for a safe DIY Halloween.


